简单点说,ROS2与ROS最大的区别就是:
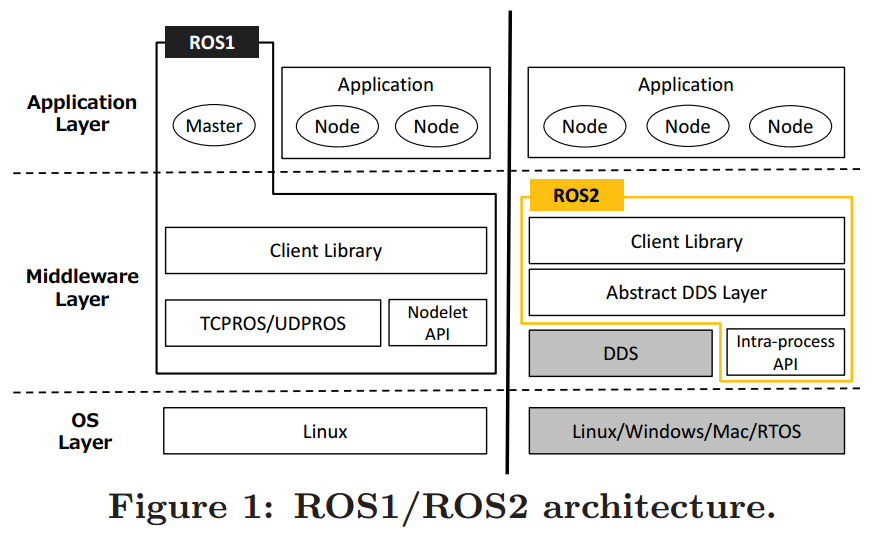
- 去掉了master改为节点自动发现(支持多机器人控制);
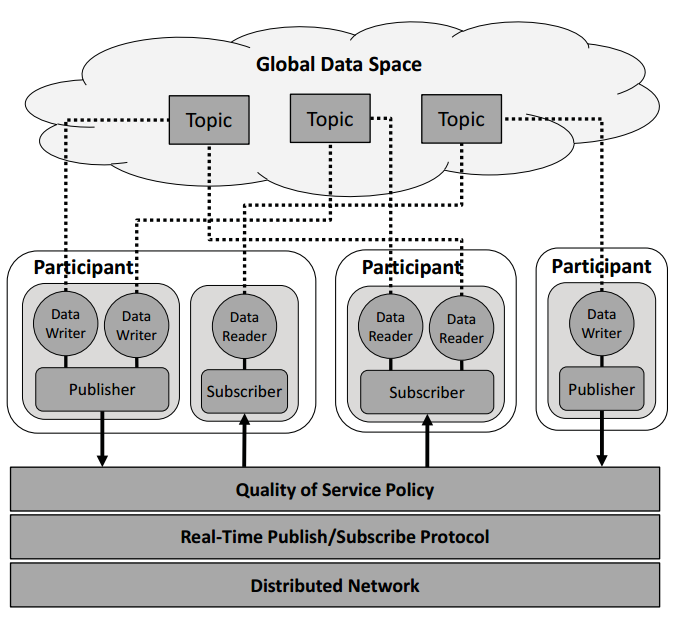
- 数据分发从TCPROS/UDPROS改为DDS(支持QoS);
- 增加了windows、Mac、RTOS支持;
- 性能(ROS2尚未稳定,总体性能目前暂无明显优势);
ROS1/ROS2架构图对比
ROS1/ROS2订阅/发布模型对比
安装ROS2
ROS2可以和ROS1共存在同一台电脑上(通过.bashrc控制用哪个),安装方法和ROS1类似:
参考:Ubuntu (Debian) — ROS 2 Doc: Galactic(Galactic需要Ubuntu20版本)
# 设置local
locale # check for UTF-8
sudo apt update && sudo apt install locales
sudo locale-gen en_US en_US.UTF-8
sudo update-locale LC_ALL=en_US.UTF-8 LANG=en_US.UTF-8
export LANG=en_US.UTF-8
locale # verify settings

# 确保Ubuntu Universe存储库已启用
sudo apt install software-properties-common
sudo add-apt-repository universe
# 添加ROS2 GPG密钥
sudo apt update && sudo apt install curl -y
sudo curl -sSL https://raw.githubusercontent.com/ros/rosdistro/master/ros.key -o /usr/share/keyrings/ros-archive-keyring.gpg
# 添加sources.list
echo "deb [arch=$(dpkg --print-architecture) signed-by=/usr/share/keyrings/ros-archive-keyring.gpg] http://packages.ros.org/ros2/ubuntu $(. /etc/os-release && echo $UBUNTU_CODENAME) main" | sudo tee /etc/apt/sources.list.d/ros2.list > /dev/null

# 升级cmake
pip config set global.index-url https://pypi.tuna.tsinghua.edu.cn/simple
pip install pip -U
pip install cmake
export PATH=${PATH}:/home/work/.local/bin  # 使用pip安装的最新版cmake

# 安装ros2 galactic
sudo apt update    # 更新apt存储库缓存
sudo apt upgrade   # 更新Ubuntu系统
sudo apt install ros-galactic-desktop python3-argcomplete python3-colcon-common-extensions

# 配置环境
echo "source /opt/ros/galactic/setup.bash" >> ~/.bashrc
echo "export ROS_DOMAIN_ID=110" >> ~/.bashrc
# echo "export ROS_LOCALHOST_ONLY=1" >> ~/.bashrc    # 不与局域网的其他设备通信
source ~/.bashrc
# 检查环境
printenv | grep -i ROS


# 测试demo
mkdir -p ~/ros2_ws/src
cd ~/ros2_ws/src
git clone https://github.com/ros2/demos.git
cd ~/ros2_ws
colcon build   # ros2不用catkin_make改用colcon了
colcon test
source install/setup.bash

ros2 run demo_nodes_cpp talker    #源码参考~/ros2_ws/src/demos/demo_nodes_cpp
  [INFO] [talker]: Publishing: 'Hello World: 1'
  [INFO] [talker]: Publishing: 'Hello World: 2'
  [INFO] [talker]: Publishing: 'Hello World: 3'
ros2 run demo_nodes_py listener   #源码参考~/ros2_ws/src/demos/demo_nodes_py
  [INFO] [listener]: I heard: [Hello World: 1]
  [INFO] [listener]: I heard: [Hello World: 2]
  [INFO] [listener]: I heard: [Hello World: 3]

# 创建功能包
#ros2 pkg create learning_ros2
SLAM建图与导航仿真测试
安装gazebo、turtlebot3仿真:
# 安装gazebo
curl -sSL http://get.gazebosim.org | sh

# 下载turtlebot3源码(后边学习和gazebo models用)
cd ~/project
git clone https://github.com/ROBOTIS-GIT/turtlebot3 -b galactic-devel    #-b选择galactic-devel的分支
git clone https://github.com/ROBOTIS-GIT/turtlebot3_msgs -b galactic-devel
git clone https://github.com/ROBOTIS-GIT/turtlebot3_simulations -b galactic-devel

# 安装turtlebot3及依赖  (源码https://github.com/ROBOTIS-GIT/turtlebot3*)
sudo apt install ros-galactic-turtlebot3* ros-galactic-gazebo-* ros-galactic-cartographer* ros-galactic-navigation2 ros-galactic-nav2-* python3-vcstool ros-galactic-lifecycle* ros-galactic-composition* ros-galactic-libg2o

# 配置
echo "export TURTLEBOT3_MODEL=burger" >> ~/.bashrc
source ~/.bashrc

# 复制turtlebot3模型到gazebo目录
mkdir ~/.gazebo/models
cp -r ~/ros2_ws/src/turtlebot3_gazebo/models/* ~/.gazebo/models/
建图&导航仿真测试:
# 打开第一个终端,运行gazebo环境
ros2 launch turtlebot3_gazebo turtlebot3_world.launch.py

# 打开第二个终端,使用Cartographer进行建图
ros2 launch turtlebot3_cartographer cartographer.launch.py use_sim_time:=True

# 打开第三个终端运行键盘控制节点(w/a/s/d)
ros2 run turtlebot3_teleop teleop_keyboard

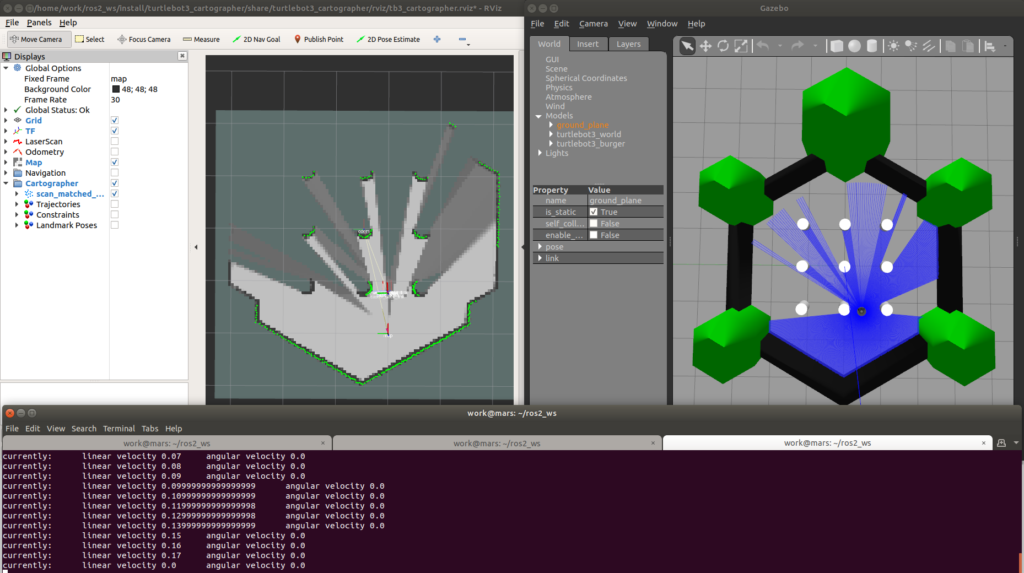
# 然后你就能愉快的控制仿真turtlebot3在仿真环境里建图了
# 保存地图
mkdir ~/ros2_ws/map
ros2 run nav2_map_server map_saver -f ~/ros2_ws/map/test
ll ~/ros2_ws/map/
    -rw-r--r-- 1 work work 41220 Jun 19 18:51 test.pgm
    -rw-r--r-- 1 work work   145 Jun 19 18:51 test.yaml

# 关闭cartographer和键盘程序,打开navigation2导航程序
ros2 launch turtlebot3_navigation2 navigation2.launch.py use_sim_time:=True  map:=/home/work/ros2_ws/map/test.yaml

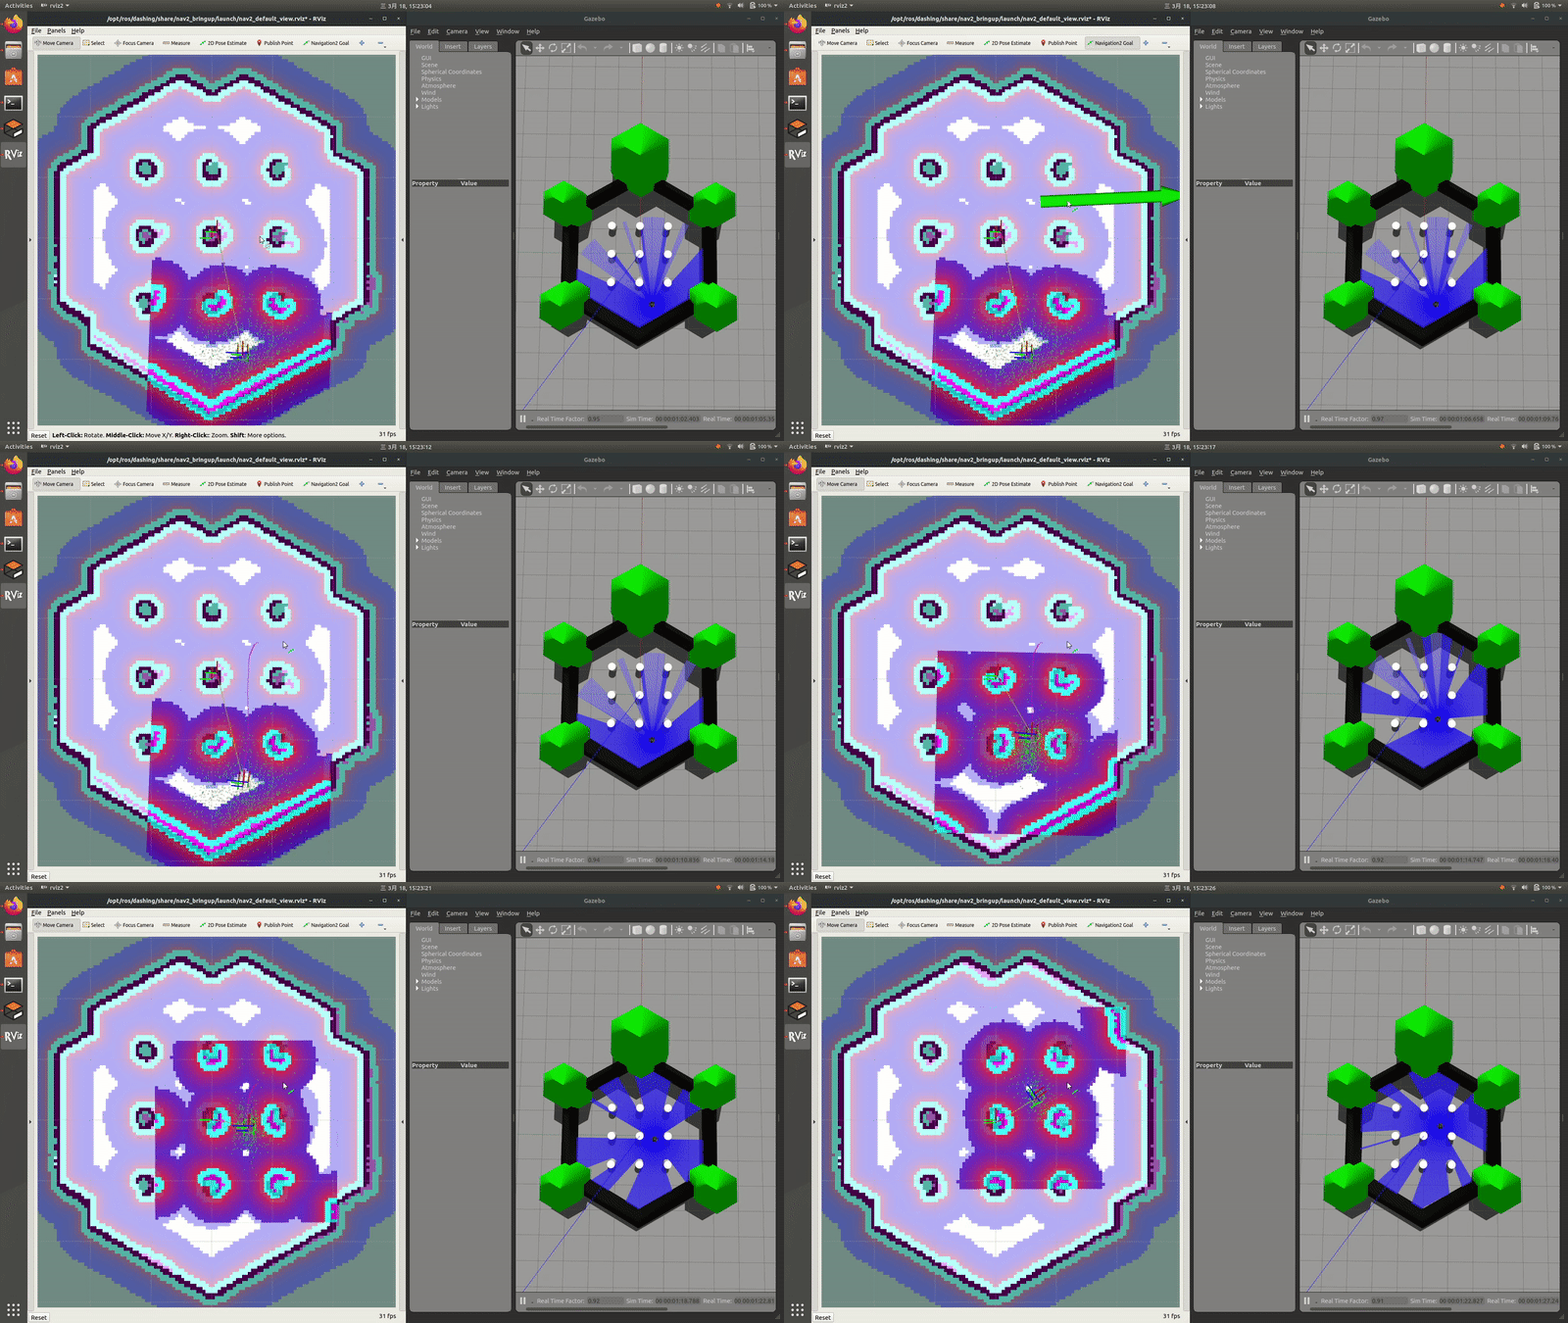
#之后和ROS1中的操作一致,先使用2D Pose Estimate对机器人的位置进行初始化,之后就可以用2D New Goal指定目标进行导航了。
参考:
[译] Fast RTPS与Cyclone DDS与OpenSplice DDS对比测试


