为了做车牌识别训练,先单独研究下怎么从照片里扣出车牌区域。
大概思路:转化成灰度图、使用高斯平滑、中值滤波、Sobel边缘化检测、膨胀轮廓、腐蚀细节、轮廓筛选、保存轮廓区域原图。
代码如下:
vim cut_platenumber.py
#!/usr/bin/env python
# coding=utf-8
# 从下载的图片里扣出车牌区域
# sh clear.sh && python cut_platenumber.py >log/cut_platenumber.log
import uuid
import os
import copy
import cv2
import numpy as np
import random

class CutPlateNumber:
    """从下载的图片里扣出车牌区域"""

    def preprocess(self, gray, name=''):
	"""形态学变换的预处理"""
	print '__preprocess__'
        # 高斯平滑
        gaussian = cv2.GaussianBlur(gray, (3, 3), 0, 0, cv2.BORDER_DEFAULT)
	self.write_image(gaussian, name, 'gaussion')
        # 中值滤波
        median = cv2.medianBlur(gaussian, 5)
	self.write_image(median, name, 'median')
        # Sobel算子,X方向求梯度,对图像进行边缘检测
        #sobel = cv2.Sobel(median, cv2.CV_8U, 1, 0, ksize=3)
        sobel = cv2.Sobel(median, cv2.CV_16S, 1, 0, ksize=3)
	sobel = cv2.convertScaleAbs(sobel)
        # 二值化
        ret, binary = cv2.threshold(sobel, 170, 255, cv2.THRESH_BINARY)
	self.write_image(binary, name, 'threshold')
        # 膨胀和腐蚀操作的核函数
        element1 = cv2.getStructuringElement(cv2.MORPH_RECT, (9, 1))
        element2 = cv2.getStructuringElement(cv2.MORPH_RECT, (9, 7))
        # 膨胀一次,让轮廓突出
        dilation = cv2.dilate(binary, element2, iterations=1)
	self.write_image(dilation, name, 'dilation')
        # 腐蚀一次,去掉细节
        erosion = cv2.erode(dilation, element1, iterations=1)
	self.write_image(erosion, name, 'erosion')
        # 再次膨胀,让轮廓明显一些
        dilation2 = cv2.dilate(erosion, element2, iterations=2) #iterations设置太大但车牌区域很小时非车牌区域容易边缘连片过度,设置太小但车牌占比过大时容易省简称和后边连不上
	self.write_image(dilation2, name, 'dilation2')
        return dilation2


    def find_region(self, img, imagePath='', name=''):
        """查找车牌所在区域"""
	print '__find_region__'
        # 查找轮廓
        binary, contours, hierarchy = cv2.findContours(img, cv2.RETR_TREE, cv2.CHAIN_APPROX_SIMPLE)

        # 轮廓筛选
        region = {}
	standard_w_h_retio = 45/15 #标准车牌宽45cm/高15cm=3
	standard_full_retio = 0.2 #常见车牌占图片大小
	min_ratio_diff = 99 #与标准车牌长宽比差异最小的值*在图像中的占比大小
	img_regins = cv2.imread(imagePath)  #所有轮廓叠加对象
        for i in range(len(contours)):
            cnt = contours[i]
            # 计算该轮廓的面积
            area = cv2.contourArea(cnt)
            # 面积小的都筛选掉
            if (area < 2000):
                continue

            # 找到最小的矩形,该矩形可能有方向
            rect = cv2.minAreaRect(cnt)

            # box是四个点的坐标
            box = cv2.cv2.boxPoints(rect)
            box = np.int0(box)
	    #print box

	    # 不规则形状转矩形(取左上角最小和右下角最大坐标)
	    xs = [box[0, 0], box[1, 0], box[2, 0], box[3, 0]]
            ys = [box[0, 1], box[1, 1], box[2, 1], box[3, 1]]
            xs_sorted_index = np.argsort(xs)
            ys_sorted_index = np.argsort(ys)
	    #print xs,xs_sorted_index
	    #print ys,ys_sorted_index

            x1 = box[xs_sorted_index[0], 0] - 20 #左侧省简称部分边缘检测效果不太好,轮廓往左多取一点
            y1 = box[ys_sorted_index[0], 1]
            x2 = box[xs_sorted_index[3], 0]
            y2 = box[ys_sorted_index[3], 1]
	    if x1 < 1: x1 = 1
	    if y1 < 1: y1 = 1

            # 计算矩形宽高比
            width = abs(x2 - x1)
            height = abs(y2 - y1)
            wh_ratio = float(width) / float(height)
	    #计算矩形在大图中的像素占比
	    full_ratio = float(width*height) / float(img.shape[0] * img.shape[1])
            #计算矩形在图像中的上下位置与图片大小的匹配合理性(值越小表示越合理)
	    postion_right_ratio_y = abs(0.5 - float(y2-height/2)/img.shape[1]) * abs(full_ratio - standard_full_retio)  #上下位置与图片大小合理性
	    postion_right_ratio_x = abs(0.5 - float(x2-height/2)/img.shape[0]) * abs(full_ratio - standard_full_retio)  #左右位置与图片大小合理性
	    #postion_right_ratio = (postion_right_ratio_y**2*600 + postion_right_ratio_x**2*400)/2 #放大合理性的差值,上下权重高些
	    postion_right_ratio = (postion_right_ratio_y*0.6 + postion_right_ratio_x*0.4)/2 #放大合理性的差值,上下权重高些
            #复合权重比(高宽比与标准的差值、图像位置与图像大小的合理性)
	    ratio = abs(wh_ratio - standard_w_h_retio)*0.03 + postion_right_ratio * 0.97
	    print abs(wh_ratio - standard_w_h_retio),postion_right_ratio

	    #宽高比及拍照框占比过滤
	    print i,area,'['+str(x1)+','+str(y1)+' '+str(x2)+','+str(y2)+']',round(wh_ratio,2),round(full_ratio,3),round(postion_right_ratio_x,2),round(postion_right_ratio_y,2),round(postion_right_ratio,2),round(ratio,4)
            if (wh_ratio < standard_w_h_retio - 1.2 or wh_ratio > standard_w_h_retio + 2) or (full_ratio < 0.015 or full_ratio > 0.5):    #高宽比>2.3 && <5; 拍照框在整图中的占比应>5% && <50%
                continue

	    # 矩形轮廓标记图
	    img_regin = cv2.imread(imagePath)
	    cv2.rectangle(img_regin, (x1, y1), (x2, y2), (0, 255, 0), 2)  #单轮廓
	    cv2.rectangle(img_regins, (x1, y1), (x2, y2), (0, 255, 0), 2) #轮廓叠加
	    cv2.putText(img_regins, str(i)+' '+str(round(ratio,4)), (x1+3, y1+15), cv2.FONT_HERSHEY_SIMPLEX, 0.5, (0, 255, 255), 1) #轮廓叠加图上标记轮廓序号
	    self.write_image(img_regin, name, 'regin'+str(i))
	    if ratio < min_ratio_diff: #保存复合权重最合理的那个轮廓
		min_ratio_diff = ratio
	        region = {'x1':x1,'x2':x2,'y1':y1,'y2':y2}

	self.write_image(img_regins, name, 'regin')  #轮廓叠加图像保存
        return region

    def write_image(self, img, name, step='', path='tmp'):
	"""保存图片并打印"""
	if False:
	    return
	if step != '':
	    img_file = './data/'+path+'/'+name.split('.')[0]+'.'+step+'.'+name.split('.')[1]
	else:
	    img_file = './data/'+path+'/'+name
	cv2.imwrite(img_file, img)
	print img_file

    def start(self, imagePath, name):
	"""开始裁剪"""
	print "START\t" + imagePath
        # 读取图片
        img = cv2.imread(imagePath)
        # 转化成灰度图
        gray = cv2.cvtColor(img, cv2.COLOR_BGR2GRAY)
	self.write_image(gray, name, 'gray')
        # 形态学变换的预处理
        dilation = self.preprocess(gray, name)
        # 查找车牌区域
        region = self.find_region(dilation, imagePath, name)
	print region
        if len(region) > 0:  #车牌轮廓查找成功
	    # 从灰度图中扣取轮廓矩形并缩放
            img_plate = cv2.resize(gray[region['y1']:region['y2'], region['x1']:region['x2']] ,(180, 60))
	    # 保存车牌区域抠图结果
	    save_path = 'images_train'
	    if random.random() < 0.1:  #10%放到测试集
	        save_path = 'images_test'
	    self.write_image(img_plate, name, path=save_path)
	    print "FOUND PLATE NUMBER!\t" + name

if __name__ == '__main__':
    img_path = './data/download_rename/'
    cutPlateNumber = CutPlateNumber()
    # 获取原图列表
    imgs = os.listdir(img_path)
    for img in imgs:
	#img = '辽B48599.jpg'
        cutPlateNumber.start(img_path + img, img)
	#break
单测结果:

各步骤效果图:
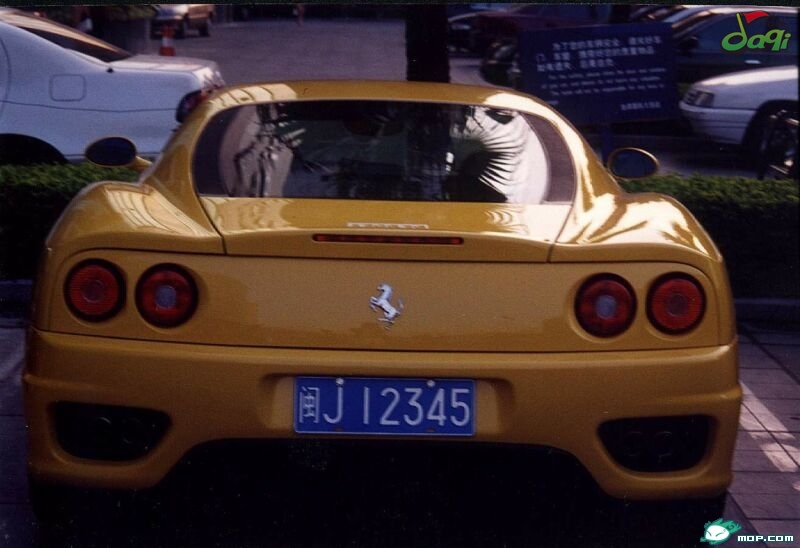
原图:
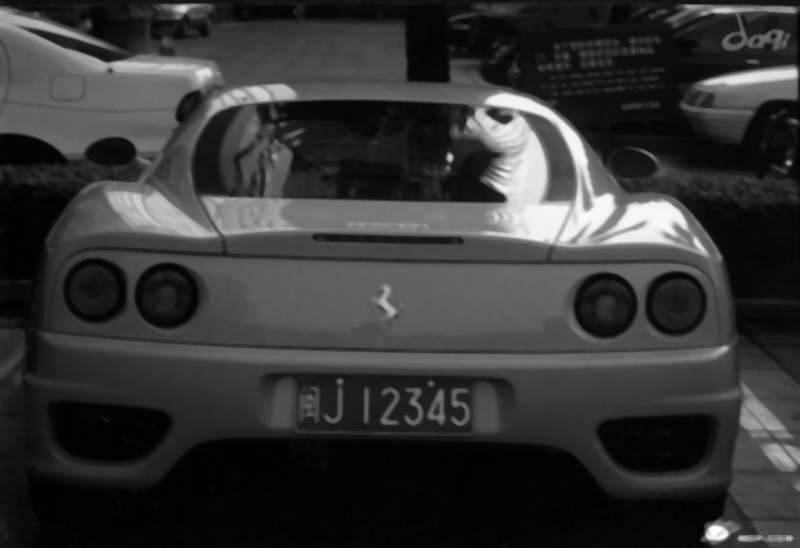
灰度图:

高斯平滑:

中值滤波:
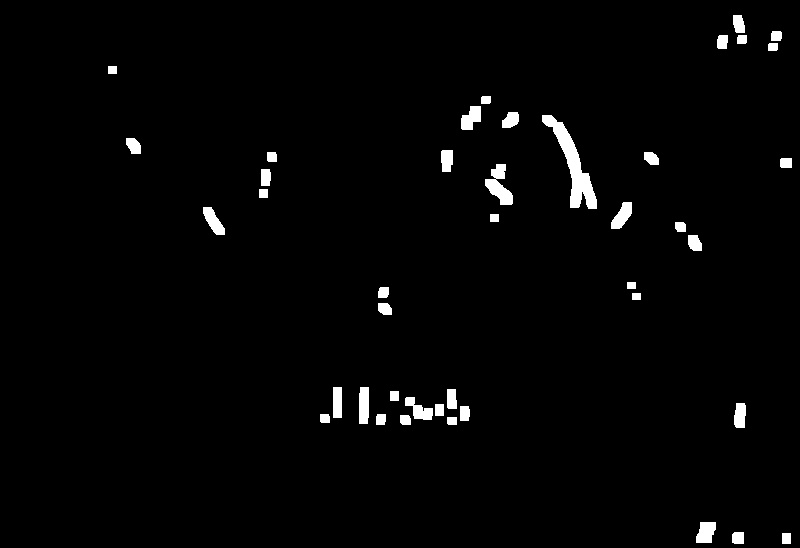
sobel边缘检测+二值化:

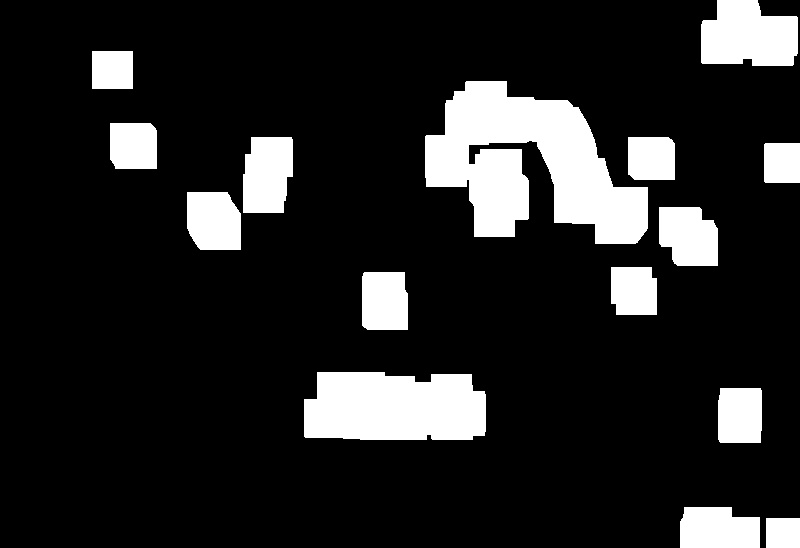
轮廓膨胀一次:
腐蚀细节:

再次轮廓膨胀:
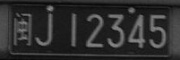
轮廓转换矩形后,筛选出的高宽比最接近车牌的区域:
序号 面积 [x1,y1 x2,y2] 宽高比 面积占比 上下位置与图片大小合理性 左右位置与图片大小合理性 平均合理性 复合权重比
3 8226.5 [291,366 483,437] 2.7 0.031 0.05363 0.00042 0.011 0.0194

从灰度图对应位置中扣取轮廓矩形并缩放:
这个方法的关键点在边缘检测后的膨胀腐蚀和轮廓的筛选,可以通过调节preprocess和筛选参数来优化扣图效果。
yan 18.12.4 23:45
参考:https://blog.csdn.net/sunny2038/article/details/9170013